How to Set Up an AI Chat Widget in Under 5 Minutes
Add an AI chat widget to your website in under five minutes without coding—customize appearance, enable lead capture, and test before launch.
How to Set Up an AI Chat Widget in Under 5 Minutes
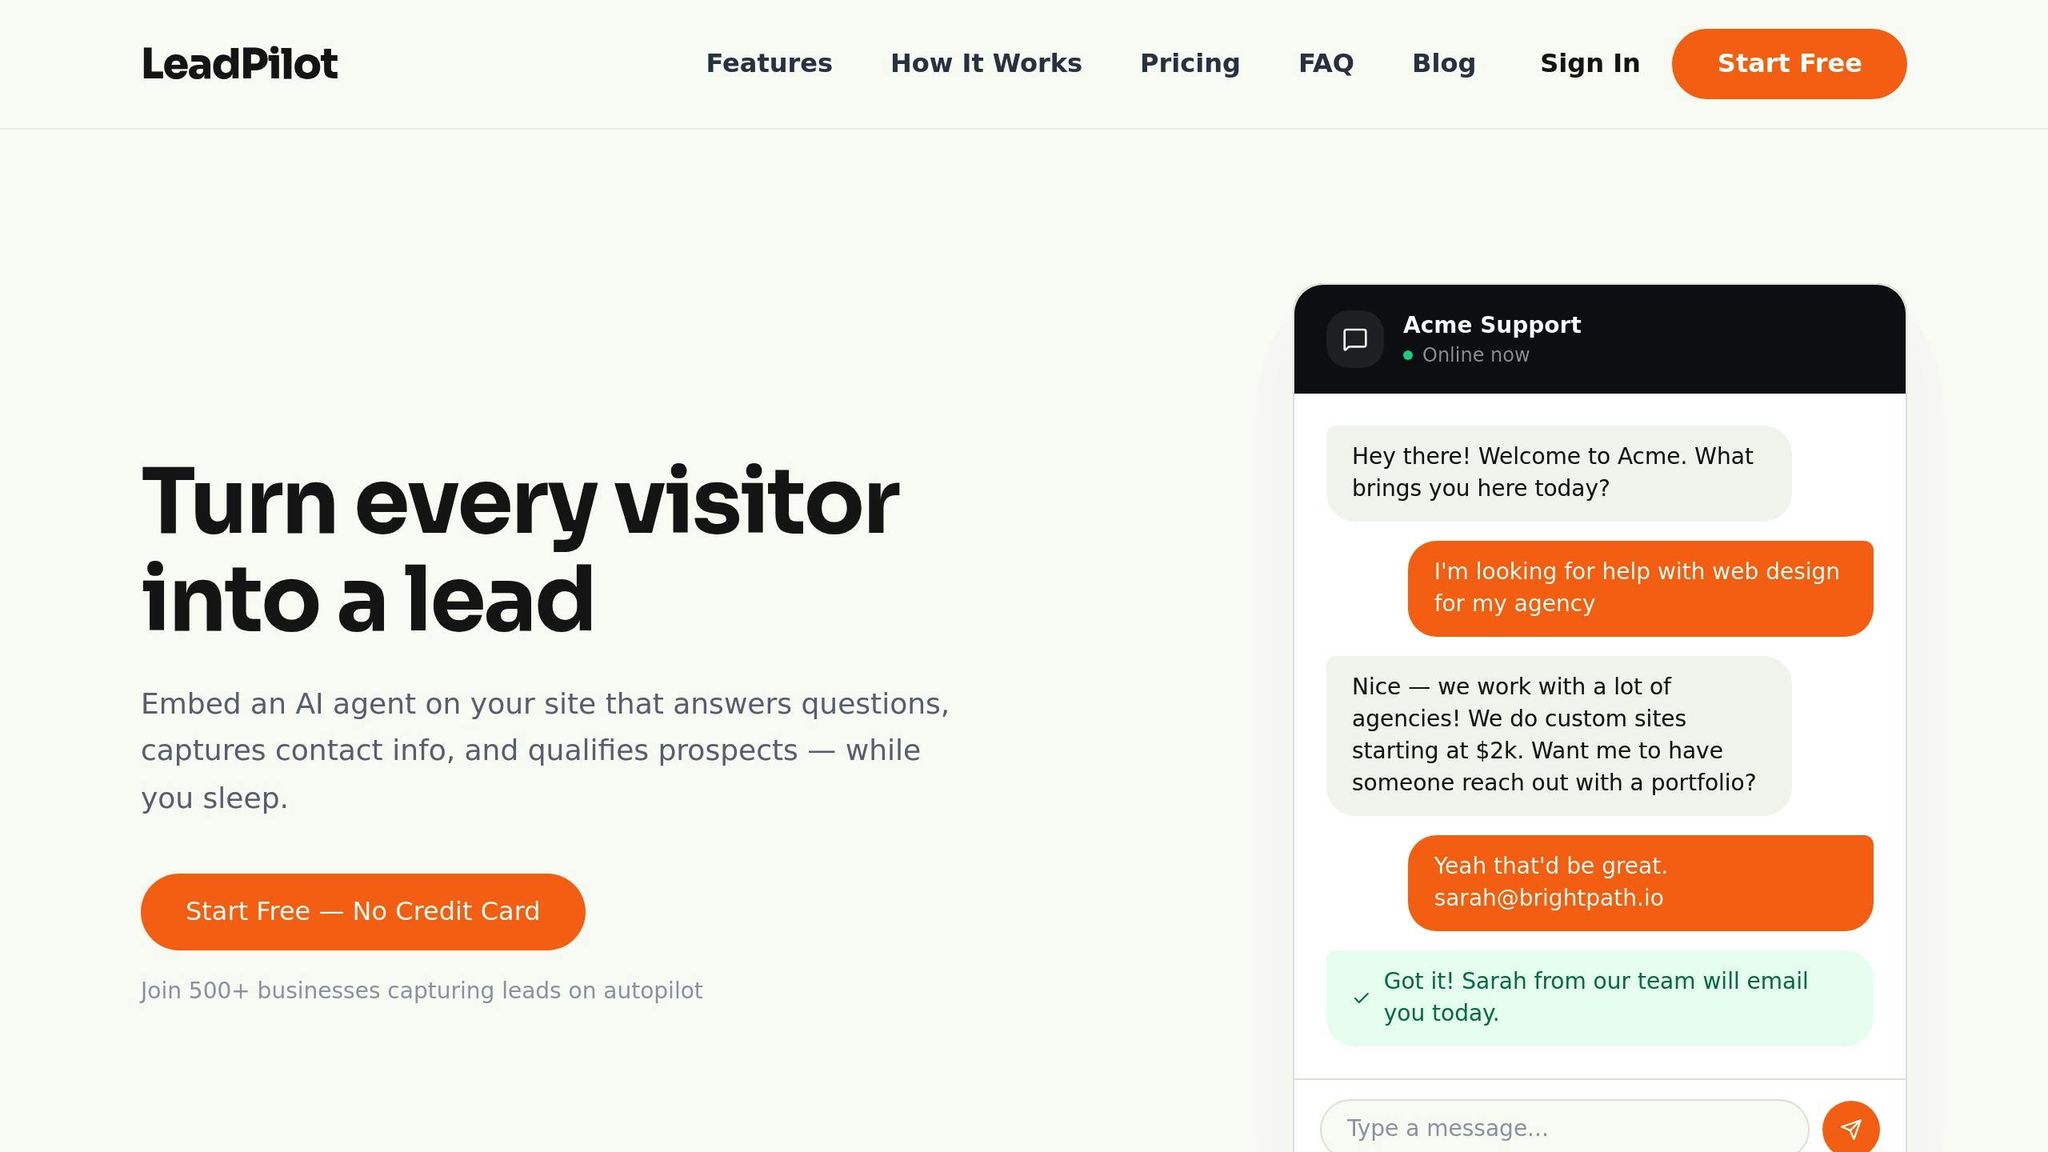
Want to add an AI-powered chat widget to your website in just five minutes? Here's how you can do it quickly without any coding skills. AI chat widgets are tools that engage visitors, answer questions, and collect leads 24/7. With tools like LeadPilot, you can set up a fully functional widget in no time.
Key Steps:
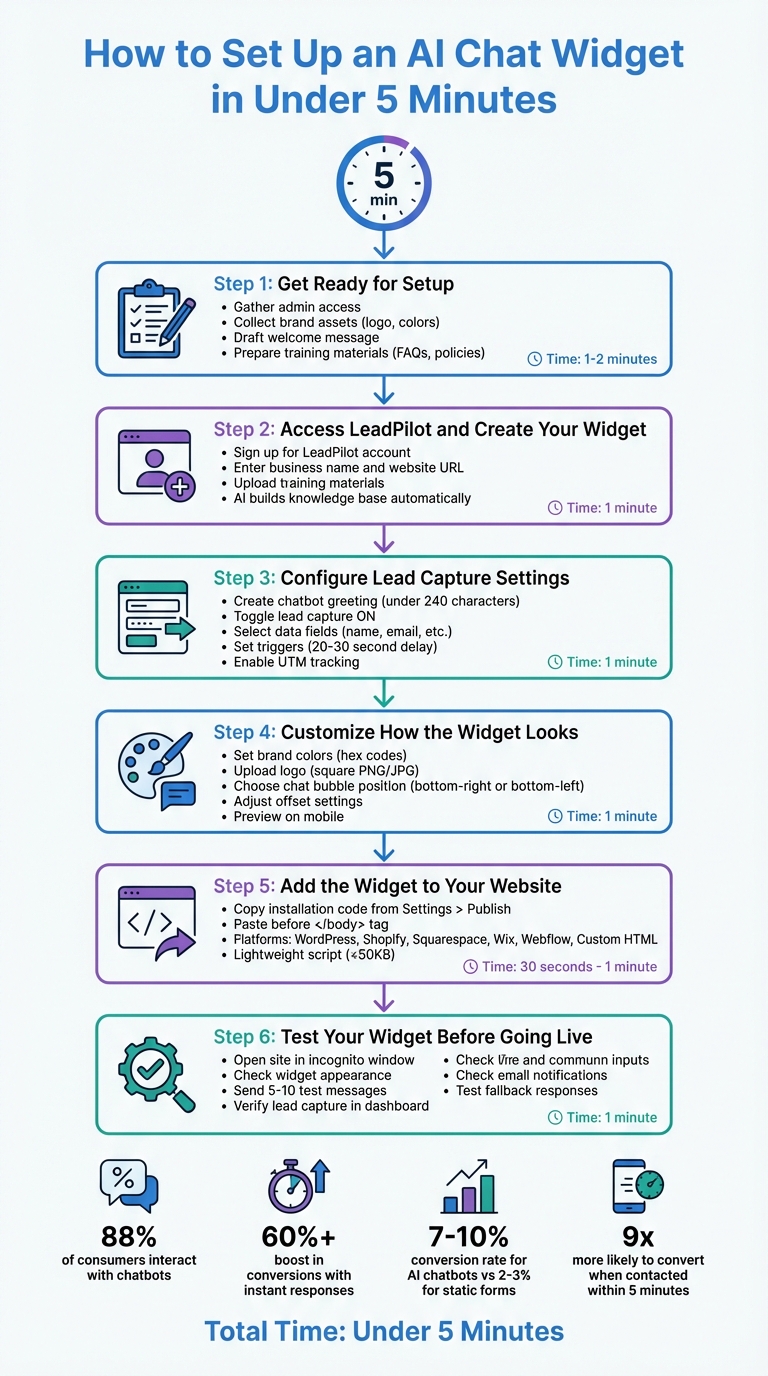
- Prepare Essentials: Gather admin access, brand assets (logo, colors), and training materials (FAQs, policies, etc.).
- Sign Up on LeadPilot: Create an account, upload resources, and let the AI build a knowledge base.
- Customize Widget: Adjust colors, upload your logo, and personalize the chatbot greeting.
- Install Widget on Your Website: Copy the provided code and paste it into your website's footer.
- Test Before Launching: Verify functionality, lead capture, and email notifications.
Why It Matters:
- 88% of consumers interact with chatbots, and instant responses can boost conversions by over 60%.
- Companies like Bloom & Wild have reduced response times to under 10 seconds and increased conversions by 27%.
Follow these simple steps, and your AI chat widget will be live, ready to engage visitors and collect leads effortlessly.
6-Step Guide to Setting Up an AI Chat Widget in 5 Minutes
Build a Free AI Chatbot in Minutes (No Coding Required)
sbb-itb-b3fe1da
Step 1: Get Ready for Setup
Before diving into the setup process, make sure you have everything you need on hand. This will help you avoid interruptions and ensure a smooth, efficient setup experience.
What You'll Need
Here’s a quick checklist to prepare:
- Admin Access: Make sure you have admin-level access to your website's backend, whether it's WordPress, Shopify, Squarespace, or another platform.
- Brand Assets: Gather high-resolution versions of your company logo and your brand's Hex color codes (e.g., #FF5733).
- Welcome Message and Prompts: Draft a friendly welcome message and a few quick-reply prompts like "What is your return policy?" or "How do I track my order?"
- Training Materials: Collect digital resources like FAQ pages, product catalogs, support articles, shipping policies, or return guidelines in formats such as PDFs, Word documents, or URLs.
Why is this important? Studies show that 64% of consumers and 80% of business buyers expect real-time responses. By equipping your chatbot with accurate, relevant information from the start, you’ll meet these expectations and provide a better user experience.
Once you’ve gathered these essentials, you’ll be ready to move on to creating your AI chat widget. This preparation ensures that your widget integrates smoothly and reflects your brand accurately.
How Long Setup Takes
The actual installation process is quick - under five minutes on most platforms. Here's a breakdown:
| Platform | Installation Method | Estimated Setup Time |
|---|---|---|
| WordPress | Plugin (e.g., WPCode) or footer.php |
3–5 Minutes |
| Shopify | Shopify App Store or theme.liquid |
3–5 Minutes |
| Squarespace | Settings > Advanced > Code Injection | 5 Minutes |
| Wix | Settings > Advanced > Custom Code | 5 Minutes |
| Webflow | Project Settings > Custom Code | 5 Minutes |
| Custom HTML | Manual script injection before </body> |
< 5 Minutes |
For custom HTML sites, you’ll simply paste the widget code before the closing </body> tag. On platforms like WordPress or Shopify, you have the option to use a plugin or manually edit theme files. Either way, the process is simple and doesn’t require any coding expertise.
Step 2: Access LeadPilot and Create Your Widget
With your brand assets and training materials ready, it's time to build your AI chat widget. The best part? You won't need to write a single line of code for this process.
Create Your LeadPilot Account
Start by signing up for an account on LeadPilot. During registration, you'll need to provide your business name and website URL. This allows LeadPilot's AI to crawl your site and create a tailored knowledge base for your chatbot. For more tips on optimizing your automated sales funnel, check out the LeadPilot blog.
If you're just getting started, you can take advantage of LeadPilot's Free plan. It costs $0 per month and includes 1 AI agent with up to 50 conversations per month - no credit card required.
To ensure your chatbot provides precise, brand-specific responses, have your PDFs, Word documents, or support articles ready for upload. These materials will help enrich your chatbot's knowledge base.
Once your account is set up, head to the widget setup page to customize your chatbot.
Find the Widget Setup Page
In your LeadPilot dashboard, open the Settings menu. From there, select Conversations and click the Chat Widget button under the Communication Channels menu.
On the widget setup page, you'll need to fill out your company information - this step is essential for accurate lead data collection. After completing the form, you'll unlock the ability to customize your widget's look and feel.
Click the "Complete information" link next to the setup steps to begin personalizing your chat bubble. You can tweak its colors, positioning, and overall style. The dashboard provides easy-to-navigate tabs like "AI Chatbot", "AI Module", and "Create Agent" to guide you through the customization process.
Step 3: Configure Lead Capture Settings
Once your widget is ready for customization, it's time to fine-tune it for capturing leads effectively.
Create Your Chatbot Greeting
Make your chatbot's greeting specific to the page it appears on. For instance, on a pricing page, you could use: "Comparing plans? I can estimate your monthly cost in 60 seconds." On a service page, try: "I noticed you're exploring our [Service]. Want to check out our latest case study?" Keep your greetings under 240 characters and include quick reply buttons like "See pricing" or "Learn more" to make interactions smoother.
Here’s the payoff: AI chatbots typically convert 7-10% of engaged visitors, which is a big jump compared to the 2-3% conversion rate of static lead forms.
Once your greeting is ready, activate lead capture to start gathering valuable visitor information.
Turn On Lead Capture
Go to the Actions menu and toggle Lead Capture on. Decide which data fields you want to collect - name and email are the basics, but you can also request details like company name, job title, or region if it aligns with your sales process.
To maximize engagement, set triggers for when the widget should appear. For example, you could configure it to pop up after a visitor spends 20–30 seconds on a high-intent page or scrolls halfway down a feature page. A good rule of thumb is to delay pop-ups by at least 30 seconds, targeting visitors who are already engaged.
"Leads contacted within the first five minutes are 9x more likely to convert." - Ahmed Ezat, Co-Founder, Pyrsonalize.com
Additionally, enable UTM tracking in your lead settings. This allows you to automatically capture marketing source data, such as utm_source and gclid, so you can identify which campaigns bring in the most qualified leads.
Add Website Content (Optional)
If you want to improve your chatbot's responses, consider uploading additional website content. LeadPilot’s AI uses semantic search to understand the context of your content rather than relying on keyword matches. You can also provide your website URL, and LeadPilot will crawl your site to build a knowledge base automatically.
This step isn’t mandatory - if you’re short on time, you can skip it and still capture leads effectively. Training your AI can always be done later.
Step 4: Customize How the Widget Looks
Now that you've set up lead capture, it's time to make your widget visually match your website. A consistent design helps the widget feel like a natural part of your site.
Set Colors and Add Your Logo
Go to Settings > Appearance to get started. Use your brand's hex color code (e.g., #0066CC) to set the widget's theme color. You can also pick separate colors for bot messages and visitor messages to create a clear distinction.
Next, click "Upload Logo" and add a square PNG or JPG with a transparent background. Make sure the file is optimized for quick loading. Once uploaded, your logo will replace the default chat icon, giving the widget a personalized touch that aligns with your branding.
For readability, pair dark backgrounds with white text or light backgrounds with dark text. To meet accessibility guidelines, ensure your text and background contrast ratio is at least 4.5:1.
Choose the Chat Bubble's Position
The bottom-right corner is the go-to spot for most chat bubbles since that's where users typically look. However, if that area is already occupied - like by a "back to top" button or cookie banner - move the bubble to the bottom-left corner instead. This way, the widget won't interfere with other elements on your page.
Fine-tune the offset settings to avoid overlapping key features, such as navigation bars or call-to-action buttons. Don’t forget to preview the widget on mobile devices to make sure it doesn’t block essential tap zones or disrupt the user experience.
Taking the time to customize your widget now ensures it will fit seamlessly into your website in the next step.
Step 5: Add the Widget to Your Website
It’s time to deploy your customized widget. LeadPilot uses a lightweight JavaScript snippet that’s under 50KB, ensuring it won’t slow down your site.
Get Your Installation Code
Go to Settings > Publish in your LeadPilot dashboard. Here, you’ll find a box with your unique installation code - a JavaScript snippet tailored to your widget. Click "Copy Code" to grab it. The best part? You won’t need to reinstall the code every time you adjust your widget’s settings or update the greeting message.
Once you’ve copied the code, follow the instructions for your website platform to complete the setup.
Install on Different Platforms
With your installation code ready, choose the setup method that matches your website platform. The process is straightforward and usually takes less than two minutes. The widget loads asynchronously, meaning it won’t impact your page speed or Core Web Vitals.
- WordPress: Use a plugin like WPCode or Insert Headers and Footers from the plugin directory. Create a new HTML snippet, paste in your LeadPilot code, and set the insertion location to “Site Wide Footer.” This method avoids the risk of losing your code during theme updates.
-
Shopify: Go to Online Store > Themes > Edit Code, open the
theme.liquidfile, and scroll to the bottom. - Squarespace: Head to Settings > Advanced > Code Injection and paste your LeadPilot code into the "Footer" section. Don’t forget to hit Save.
-
Custom HTML: Open your site’s HTML file (usually
index.html) in a text editor. Find the</body>tag near the bottom of the file. To make the widget appear on multiple pages, repeat this step for each page.
For all platforms, make sure to insert the code right before the closing </body> tag.
Once you’ve saved your changes and published your site, you’ll be ready to move on to testing in the next step.
Step 6: Test Your Widget Before Going Live
After installing your widget, it’s critical to test it thoroughly before allowing visitors to interact with it. Testing ensures everything works smoothly and helps you identify any problems early.
Check if the Widget Appears
Start by opening your website in a private or incognito window. This guarantees you’re viewing the most up-to-date version of your site. Look for the chat bubble in the corner where you placed it during setup. If it’s not visible, open your browser’s Developer Tools (press F12) and check the Console tab for red error messages. These often indicate issues like incorrect script placement or blocked resources.
Turn off any ad blockers during testing, as they might incorrectly block the chat script. If the widget still doesn’t show up, confirm that the installation code is placed right before the closing </body> tag. For changes that don’t seem to appear, try a hard refresh with Ctrl+F5 (Windows) or Cmd+Shift+R (Mac).
Test Lead Capture and Email Notifications
Click on the widget and send several test messages - aim for around 5 to 10 - to mimic visitor interactions. Fill out the lead capture form with a name and email, then check the Visitors or Leads section in your LeadPilot dashboard to confirm the test session logged properly.
Next, verify that you receive an email notification containing the test lead’s details. If the email doesn’t arrive, double-check your notification settings under Settings > Notifications and inspect your spam folder. Additionally, test the bot’s fallback response by asking an unanswerable question like, “Can I speak to a human?” This ensures it handles such queries appropriately.
Address Common Problems
If you encounter any issues during testing, here are some quick fixes:
| Common Issue | Quick Fix |
|---|---|
| Widget not appearing | Double-check the Project ID and ensure the script is placed before </body>. |
| Widget hidden or overlapping | Adjust the CSS z-index property (e.g., set it to 9999). |
| Changes not showing | Perform a hard refresh or clear your server-side cache. |
| Duplicate widgets | Look for duplicate script tags in your theme files or tag manager. |
Once you see your test messages in the dashboard and receive email alerts without any issues, your widget is ready for real visitors. From this point on, it will work around the clock to capture leads, even when you’re unavailable.
Conclusion
In just five minutes, you've set up your AI chat widget and taken the first step toward improving visitor engagement and capturing leads effortlessly. From creating your LeadPilot account to testing the widget in action, the process is designed to be smooth and hassle-free.
Now that your widget is live, it's working around the clock - engaging visitors, answering their questions, and collecting leads even when you're away. With the potential to boost conversion rates by up to 250% and cater to the nearly half of visitors who prefer live chat, you're positioned to capture more qualified leads. This is especially critical, as lead conversion rates drop by 80% when prospects wait longer than five minutes for a response.
"30% of the people who come through our doors started their conversation with the Lead Pilot Boss Widget on our website." – Matthew Rasmussen, blogger using LeadPilot.
Your widget doesn’t just capture leads - it qualifies them automatically and sends you instant email notifications, so you’re always in the loop. Over the next few days, check your LeadPilot dashboard to see what questions visitors are asking most often. These insights can help you fine-tune your bot's responses and improve your website content.
With 30% of consumers trusting AI to enhance their customer experience, you’re meeting your audience exactly where they want to be. Your AI chat widget is now live and ready to transform your website traffic into meaningful business conversations - day and night.
FAQs
Will the chat widget slow down my website?
Adding an AI chat widget to your website doesn’t have to compromise its speed - if done right. While third-party scripts can sometimes affect load times, careful management can prevent this. Opt for a trusted provider, minimize extra scripts, and routinely check your site’s performance. With proper integration, you can enjoy the widget’s benefits without slowing your site down.
How do I stop the bot from giving wrong answers?
To minimize errors, equip your AI chatbot with accurate and relevant content. This includes resources like FAQs, product manuals, and company policy details. Supplying detailed information helps the bot better understand your business and provide more precise answers.
It's also important to monitor user interactions regularly. By reviewing these exchanges, you can identify areas where the bot might need improvement and adjust responses accordingly. Keeping the training data updated and refining its content ensures the chatbot continues to perform effectively.
Can I send captured leads to my CRM or email list?
Yes, you can send leads directly to your CRM or email list without any hassle. Many AI chat widgets come with built-in integrations that automate this process, ensuring all contact details and lead information are transferred smoothly for follow-up. For instance, AELESTRA's chat widget works perfectly with AELESTRA CRM, making lead management and follow-up more efficient.